Materials needed:
1 USB computer cable, you can get in stores or used computer USB printer cable, or it could be an extra cable if we buy a USB flash disk.
2 shells, could the former tissue, or pvc pipe should also.
3 DC Motor former children's toys
4. cable
5. cable terminal
6 cd former
7 former Cork bottle cap
The tools:
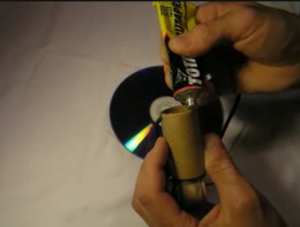
1 glue
2 screwdriver
3. scissors
4 candles
5. wire for ngelobangin, can also use a toothpick
How to Make:
1 Create 8 lines on the CD, then cut according to the pattern .:
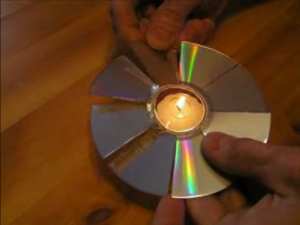
2 Heat the wax on, he rocked and twisted .:
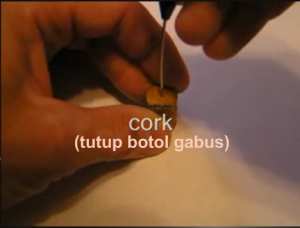
3 Holes bottle cap with wire .:
4 Insert the bottle cap into a fan that we created earlier .:

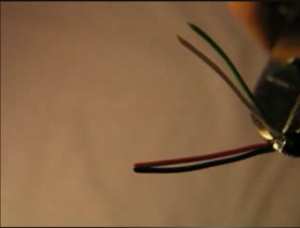
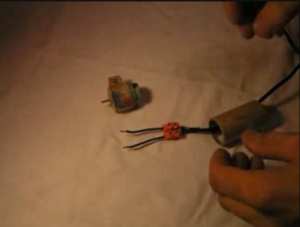
5. Peel the USB cable, and the cable cut green and white, leaving only the red and black wires. This is the red wire (+5 V) and black ground (0V) .:
6 Attach the red wire and the black cable into the terminal .:

7 Enter your sleeves and plug the cable into .:
8 Connect the DC motor, remember the red cable to the positive (+ 5V) and black to GND (ground) .:

9 Attach with glue to the CD as a holder .:
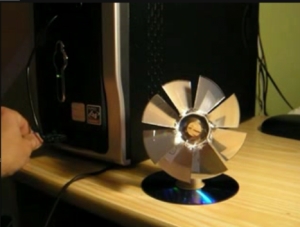
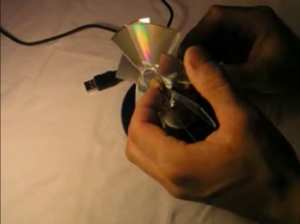
10 pairs of fan:
11. Connect the USB cable to the computer, finished .:
2 shells, could the former tissue, or pvc pipe should also.
3 DC Motor former children's toys
4. cable
5. cable terminal
6 cd former
7 former Cork bottle cap
The tools:
1 glue
2 screwdriver
3. scissors
4 candles
5. wire for ngelobangin, can also use a toothpick
How to Make:
1 Create 8 lines on the CD, then cut according to the pattern .:
2 Heat the wax on, he rocked and twisted .:
3 Holes bottle cap with wire .:
4 Insert the bottle cap into a fan that we created earlier .:
5. Peel the USB cable, and the cable cut green and white, leaving only the red and black wires. This is the red wire (+5 V) and black ground (0V) .:
6 Attach the red wire and the black cable into the terminal .:
7 Enter your sleeves and plug the cable into .:
8 Connect the DC motor, remember the red cable to the positive (+ 5V) and black to GND (ground) .:
9 Attach with glue to the CD as a holder .:
10 pairs of fan:
11. Connect the USB cable to the computer, finished .: